The side panel bottoms need replacement. Here’s how we did it:

The tricky part in doing this repair is that too much heat will warp the panel.
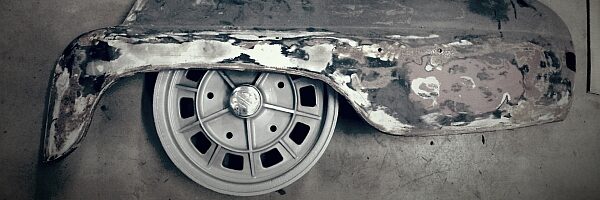
Here I have cut off the bottom section of the panel.

Making the patch – first bend it to match the shape.

Then we used an air flanger to flange the patch panel.

Not a perfect fit yet, still needs some bending and beating. The side panel curves a bit in both directions (top to bottom and lengthwise). It’s just a curvature of couple of millimeters but the patch needs to fit perfectly.

Here’s the patch spot welded to place. The outside of the panel will not be welded more, only spots. This will keep the main panel from warping and the need for beating it shape to minimal. Just grind the welds down and use paint to fill the crack between the panels. Then fill what’s left with some filler.
I know it looks crude but there’s no warping on the panels so the shape is as good as the original. Compare this to smoothing out a warped panel with a bucketfull of filler…

Here’s the patch from the inside. The bottom will be welded some more but the side is finished.
– – –
Tools of the trade.
We made a tool for the front hub bearing’s nut. It can be a bit difficult to remove if stuck and you don’t have the right tool.


Much better than banging it out with a hammer and a srewdriver…
– – –
And a few other things:

Welded close some unwanted extra holes on the dash. Next: clean it and paint it.

Parts of dash are already in primer.
Oh. And polished the mirror.
